Rucking for Beginners Australia: The Simple Start Guide
Rucking for Beginners Australia: The Simple Start Guide
Rucking — walking with a weighted backpack — is the fitness trend that sounds too simple to work and works remarkably well. Born in military training (the word comes from “rucksack”), it’s been adopted by blokes who want serious cardio and strength-endurance benefits without running’s impact or the gym’s walls. This rucking for beginners Australia guide explains what rucking does, how to start safely, what gear you need, and gives you a beginner progression plan.
Disclaimer: General information only. Start light — rucking with too much weight too soon causes back, knee, and foot issues. See your GP if you have spinal, knee, or cardiovascular conditions.
What Is Rucking, Exactly?
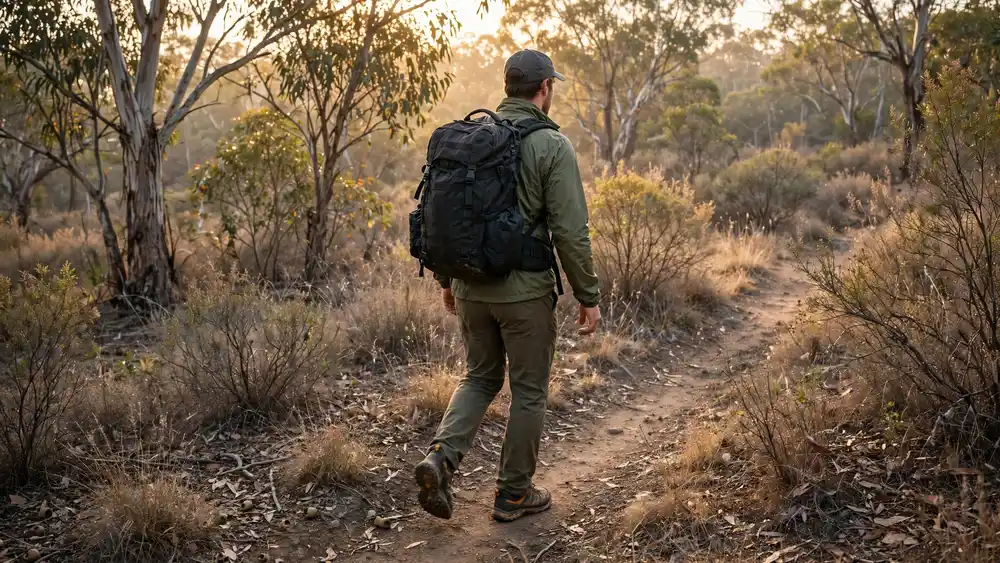
Rucking is walking with weight on your back — typically 10–30kg in a backpack — at a brisk pace (around 5–6 km/h) over varied terrain. The military has used it for a century as the foundation of infantry fitness: soldiers routinely march 15–20km with 20kg+ packs.
Why it’s trending now: it fills the gap between walking (too easy for fit blokes) and running (too much impact for many). It delivers genuine cardiovascular training, serious calorie burn, loaded-carry strength through the entire posterior chain, and bone-density benefits from axial loading — all at walking’s low injury risk. Plus it’s outdoors, social (you can talk while rucking), and gloriously simple.
The name confuses people — “rucking” just means weighted walking. If you’ve ever hiked with a heavy pack, you’ve rucked.
The Benefits: Why Blokes Are Doing It
- Cardiovascular fitness without impact. Rucking elevates heart rate into solid training zones (60–75% max) with a fraction of running’s joint stress. For blokes whose knees can’t run anymore, it’s a revelation — real cardio that doesn’t hurt.
- Serious calorie burn. A 90kg bloke rucking with 20kg at a brisk pace burns roughly 500–700 calories an hour — nearly double unweighted walking, approaching easy running, without the pounding.
- Strength-endurance. The load trains your traps, upper back, core, glutes, and legs isometrically for the duration — it’s essentially a 60-minute loaded carry. Posture muscles that desk work neglects get hours of work.
- Bone density. Axial loading (weight through the spine and hips) is one of the best stimuli for bone mineral density — increasingly important for men over 40. Rucking loads bones the way nature intended: through walking.
- Mental health. All the mood benefits of walking (see our walking guide) plus the satisfaction of doing something hard. Long rucks have a meditative quality — rhythmic, outdoor, purposeful.
- Functional carryover. Hiking, travel with luggage, carrying kids, manual work — rucking trains the loaded-walking pattern that real life demands.
The research base is thinner than for running or lifting (it’s a newer trend in civilian fitness), but the underlying mechanisms — loaded walking’s energy cost, axial loading’s bone effects, Zone 2 cardio’s benefits — are all well-established. This isn’t magic; it’s physics applied to walking.
How to Start: The First 4 Weeks
The golden rule: start embarrassingly light. This rucking for beginners Australia plan keeps the first month deliberately easy — the goal is adaptation, not heroics. The number-one rucking mistake is loading 25kg on day one because “walking is easy.” Your cardiovascular system can handle it; your feet, shins, knees, and lower back cannot — they need weeks to adapt to loaded walking. Tendons and bones adapt slower than muscles and lungs. Respect that.
- Week 1: 5kg, 30 minutes, flat terrain, 2× weekly. This should feel easy — that’s the point. You’re conditioning connective tissue, not testing yourself.
- Week 2: 5–7kg, 40 minutes, gentle hills allowed, 2× weekly.
- Week 3: 10kg, 45 minutes, 2–3× weekly. Hills are fine now.
- Week 4: 10–15kg, 60 minutes, 2–3× weekly including one longer weekend ruck.
After week 4, progress one variable at a time: add 2–5kg, or add 15 minutes, or add hillier terrain — never all three at once. A sensible long-term target for most blokes: 20kg for 60–90 minutes, 2–3× weekly. That’s serious training by any standard.
Pace: aim for 5–6 km/h on flat ground (12–10 min/km). You should be breathing firmly but able to speak in short sentences. If you’re gasping, lighten the load. If you’re strolling comfortably, add weight or find hills — but only after the 4-week base.
Gear: What You Actually Need
The pack. You don’t need an expensive tactical rucksack to start — any sturdy backpack works for the first month. Fill it with books, water bottles, or bags of rice wrapped in towels (to stop shifting). As you get serious, a proper rucksack with a hip belt, sternum strap, and padded shoulder straps matters — the hip belt transfers load to your hips, sparing your shoulders and back. Dedicated rucking packs run several hundred dollars in Australia; quality hiking packs from Kathmandu, Macpac, or Osprey work brilliantly and are more versatile.
The weight. Dedicated ruck plates are slim, stable, and designed for packs — worth it once you’re committed. Before that: water bottles (free, and you can drink the weight if you overdo it — the bushwalker’s bailout), books, or sandbags wrapped in towels. Whatever you use, pack it high and close to your back (not sagging at the bottom) and secure it so nothing shifts mid-stride — shifting weight wrecks your gait and your back.
Shoes. This matters more than the pack. You need supportive footwear with good grip — trail runners or light hiking shoes for bush tracks, sturdy runners for footpaths. Break them in before long rucks. And socks: merino or synthetic walking socks, never cotton. Blisters end rucks faster than fatigue does — our walking guide covers the blister-prevention basics that apply doubly under load.
The rest: water (more than you think — loaded walking in Aussie heat is sweaty work), sun protection, a phone, and for remote tracks, the usual bush safety gear. Tell someone your route on long solo rucks.
Form and Technique: Ruck Well
Rucking form is walking form under load — the weight magnifies every flaw:
- Stand tall. The load pulls you forward; fight it. Chest up, shoulders back, gaze ahead (not at your feet). Think “string pulling the crown of your head up.”
- Short, quick steps. Overstriding under load hammers knees and shins. Keep steps short and cadence quick, especially downhill.
- Hip belt tight, load high. The pack’s weight should sit on your hips, not drag from your shoulders. Adjust straps until the load feels carried by your hips and legs, not hanging off your traps.
- Downhill technique matters most. Shorten steps further, keep knees soft, zigzag steep descents if needed. Downhill loaded walking generates the highest joint forces — this is where injuries happen. Take it seriously.
- Use poles on serious terrain. Trekking poles aren’t cheating — they distribute load to your upper body, save your knees on descents, and add an upper-body workout.
Common Rucking Mistakes
Too much weight too soon. The classic. Your ego writes cheques your Achilles tendons can’t cash. Follow the 4-week progression above even if it feels insultingly easy — the adaptation happening in your connective tissue is invisible but critical.
Bad pack setup. Weight sloshing at the bottom of a loose pack, no hip belt, straps too loose — all of this converts a good workout into back pain. Spend 10 minutes dialling in your pack before the first ruck; it pays off every step after.
Ignoring foot care. Blisters, hot spots, black toenails — the rucker’s trilogy. Proper socks, broken-in shoes, trimmed toenails, and addressing hot spots immediately (stop and tape them — Leukotape is the gold standard) prevent 95% of foot issues.
Skipping the warm-up. Five minutes of easy unloaded walking before adding pace, plus leg swings and ankle circles. Loaded cold muscles are unhappy muscles.
Rucking through pain. Muscle fatigue: fine. Sharp knee pain, shin pain that worsens, back pain, foot pain that changes your gait: stop. Rucking is low-impact, not no-impact, and overuse injuries (stress reactions, Achilles issues) come from ignoring early warnings. See our knee injury guide if joints complain — physio first, always.
Where to Ruck in Australia
For rucking for beginners Australia, the terrain variety is unmatched — Australia is rucking paradise. Urban options: harbourside paths (Sydney), the Tan Track (Melbourne — the classic, with its famous hill), South Bank to West End (Brisbane), Kings Park (Perth), Adelaide’s Linear Park. Bush options: the Blue Mountains’ endless trails, the Great Ocean Walk sections, Wilsons Prom, the Overland Track (for the ambitious — multi-day rucking is just backpacking with intent).
Start on flat, familiar paths. Progress to hilly urban routes, then bush trails. The trail progression matters — uneven terrain under load challenges ankles, knees, and balance in ways flat paths don’t, which is excellent training once your base is built. Join a local bushwalking club or a rucking group (they exist in most capitals now — check Facebook and Meetup) for routes, company, and the accountability that keeps you going. Our consistency guide covers why the social layer matters so much for adherence.
Rucking for Weight Loss: Where It Fits
Rucking has a reputation as a fat-loss tool, and the reputation is mostly deserved — with caveats. The calorie burn is genuinely high (400–700/hour), it doesn’t spike hunger the way intense running does, and it’s sustainable daily in a way that hard intervals aren’t. A bloke rucking 60–90 minutes three times weekly burns an extra 1,500–3,000 calories a week — a meaningful contribution to a deficit without dietary misery.
But the same rules apply as all fat loss: diet drives the deficit, exercise supports it. Rucking three times a week while eating in a surplus just makes you a fitter person at the same weight — which is still a health win, but not weight loss. The winning combination is the unglamorous one: modest calorie deficit, high protein (1.6–2.2g/kg to preserve muscle), 2–3 strength sessions weekly, and rucking or walking for the activity component. Rucking’s advantage over running here is recovery cost — you can ruck frequently without the fatigue and hunger that heavy run training creates in a deficit.
One caution: don’t ruck your way into overuse injuries by chasing calorie numbers. The progression rules don’t change because the goal is fat loss — connective tissue still needs weeks to adapt to load. Increase pack weight or duration gradually even when the scales are impatient. The weight will come off; the tendons need to survive the process. For the broader framework, Australia’s physical activity guidelines at health.gov.au recommend 150–300 minutes of moderate activity weekly — rucking counts squarely toward that target.
FAQs
How heavy should my ruck weight be as a beginner?
For rucking for beginners Australia, start at 5kg for the first 1–2 weeks, regardless of fitness. Build to 10–15kg over a month, then progress gradually toward 20kg. Your connective tissue needs weeks to adapt — the weight that feels easy on day one can still injure undertrained tendons.
Is rucking better than running?
Different, not better. Rucking gives comparable cardio with far less joint impact, plus loaded-carry strength benefits running lacks. Running gives higher peak cardio stimulus and is more time-efficient. Many blokes do both — ruck for volume, run for intensity.
How many calories does rucking burn?
Roughly 400–700 per hour depending on body weight, pack weight, pace, and terrain — about double unweighted walking. Hills increase it substantially; flat easy rucks sit at the lower end.
Do I need a special backpack for rucking?
Not to start — any sturdy backpack works for the first month. As weight increases, a pack with a hip belt, sternum strap, and padded straps becomes important for comfort and back health. Dedicated ruck plates are a worthwhile upgrade once committed.
Can rucking replace leg day?
No — rucking builds strength-endurance and work capacity, not maximal strength or significant muscle. It complements lifting beautifully (many blokes ruck on rest days as active recovery) but doesn’t replace progressive resistance training. See our strength program for the lifting side.